Wednesday, March 1, 2017

Update 6


Yes it's been a while since my last video, about 3 months.
I decided that I was due, so here's my latest MHO Junction update #6.
Hope you enjoy, please subscribe to my channel and comments are welcome.

Friday, February 10, 2017

Backdrop, painting and buildings


Hey everyone,

Last update was 3 weeks ago, therefore I was due for another.

My brother came over to help me install masonite for my backdrop and we manage to install about 24 feet. I was curious to see how the backdrop I had ordered would fit. It included the sand industry, the cement factory and the refinery. Personally, there's something that doesn't look right, the backdrop looks a bit cartoonish, looks like a drawing. The reason is that the resolution is very low, the trees seems a bit blurry. For now I'll keep it like it is, but might change it when comparing with others to be done.


I finally got around to using my airbrush for the very first time. I did practice a bit on spare tracks before attacking the layout. Now I have 10 feet of main line done and it turn out to my satisfaction.


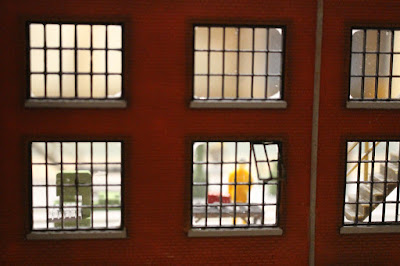
I've also been working on putting stuff and people in buildings. The little office is the control center for the cement loading plant which is furnished with a desk, filing cabinets and a figure sitting on a chair. The other two are from the machine shop viewed from the outside  and inside before installing the last wall and the roof. I still have to add an arc welding light with and Arduino before doing so.


Lastly, I started work on my brewery, got one of the many walls cut. This is the wall to the loading dock.


That's it for now, see you later.


Wednesday, January 18, 2017

January 2017 Update


Yes it's been a while since my last update, so here we go.

My last update was in mid December, but with the holidays, not a whole lot was worth updating. I finally came up with a new name and logo for my layout. It will be called MHO Junction where Hawkesbury is the junction between Montreal and Ottawa.


I did do a lot of wiring which I don't want to bore you with the details, but I will say that I finally got trains running in the staging area, which by the way is still not completely finish. I also got a section of the main layout wired so that the trains can leave the staging area, up the helix and on a straight away. 


I worked on my panel which will control the staging area. I finally got everything working like I wanted. A push button will activate my turnouts which will trigger the right color of the bi-color LED on my panel for the available direction to take. 


I took a small break and build the machine shop. It will have some machine tools inside, lights inside and out, a gravel roof and lots of scenery. As per the picture, you're probably wondering why a different kind of bricks where the top windows are, well, once that section glued, I realized that I had forgotten to put the windows in. So my story is, the second floor had a fire and the windows were bricked up and I'm sticking to my story. 


I also worked on my gorge, but now I need to work on the two trestles before doing more work on it.


I was so anxious to start work on my brewery, that I began working on a mock-up. What you see is only one third of the size. I'll be picking up a sheet of 4' x 8' sheet of polystyrene and ordered a few roof top equipment to get me started.


I will also be participating in Arduino classes online with the other group I'm part of. This should be fun because my goal is to have animation on my layout.

For the next coming weeks, I'll be working on more wiring, the trestles, finishing the staging area, the brewery and more panels.

That's it for now, later

Monday, December 12, 2016

More progress as been done, but not without difficulties.


When doing research and finding articles , pictures and videos, it's not always black and white. Picture of the final results are not always explanatory, articles are sometimes, (or almost always) written in terms of specialist and not common everyday people and videos don't always show exactly what as to be done. This is why questions need to be asked. But again, lots of answers are often vague or off subject.

I wanted a system which for now could run my trains without having to undo what I had done. At a later stage I would like to have my layout linked to a computer, so toggle switch was out since a toggle switch can't toggle if action was done on a computer. A push button would solve this (seen on a video), but how?

I read that NCE had a push button board that could accept 8 push button which then linked to a switch8 could activate 8 tortoises. GREAT, but how does all this work and how to wire all this together? More reading and I then find out I need 2 push button per tortoises, the reason why the button board has 16 inputs. PROBLEM...... I don't want two buttons, I want one, now what?

More videos, pictures and reading, now I want LED's to be activated on a control board, but how do I do that? There are single LED's, Bi-color 2pin and 3 pin, etc etc. I need help!!!

After posting for help here, my hangout group, on Facebook and on the NCE Yahoo group, I finally got all the answers needed to continue. Like I said earlier, I get all kinds of answers, like I'm talking about push buttons and I get an answer on toggle switches, but I do appreciate the help.

I've been working on my hardware board as shown here:


The square hardware is the button board, I need two, therefore 16 push button. I did get the answer for installing one push button instead of two. All I need to do is reprogrammed the board, which to me was WHAT????? It ended up being very simple. "Setting CV548 = 1 will cause each push-button connected via the ‘Button Board’ to ‘toggle’ the switch machine output, i.e. each press of one button will alternate the switch’s position. Thus only 8 push-buttons are needed; each is connected to an ‘N’ terminal, so less wires in the control panel. Setting CV548 = 0 disables it. (Factory default = 0)."

The two identical rectangular hardware are the Switch8 which will activate the tortoises, that one was simple.

The rectangular piece at top is the circuit breaker

You can see my push button that is temporarily installed, I tested the system and ran a train with 2 LED's for the future panel and everything WORKED as I wanted. For me this is a great step forward since when it comes to electronics or electricity, I'm illiterate.

Half of my staging area is completed, that includes, soldering, wiring, tortoises. Hope to have the rest finished by year end, except for the control panel as I'm waiting for more LED's.


Not much to show, but lots is getting done.
Thanks to those that took the time to help me
Later

Saturday, November 26, 2016

Almost a month, so time for another update.


Work as been started on the last part of the layout, roadbed has started and a bit of scenery.


Framework for a wall which will separate the layout from my workbench and the dispatcher.


I build this little trolley for my desktop so I can bring it wherever I'm working.


This is my gorge which is work in progress. I want falls on either side which will meet at the bottom in a lake.


This is a shale cliff. I made it with ceiling tiles.


Started on the roadbed of the staging area. Easy when you have nothing on top, but having to install it under your main level is not recommended. I never knew I could bend in so many ways.


Well, that's it for now. Before year end, I would like my staging area to be finish, which would include the tortoises and all the wiring.